
A Quick Guide to Help You Take Better Hiking Photos
"Capturing breathtaking landscapes while hiking can be both rewarding and challenging. By mastering a few essential techniques, you can transform your outdoor adventures into a gallery of stunning photographs. Here are 5 tips to elevate your hiking photography game and make the most of every shot!"
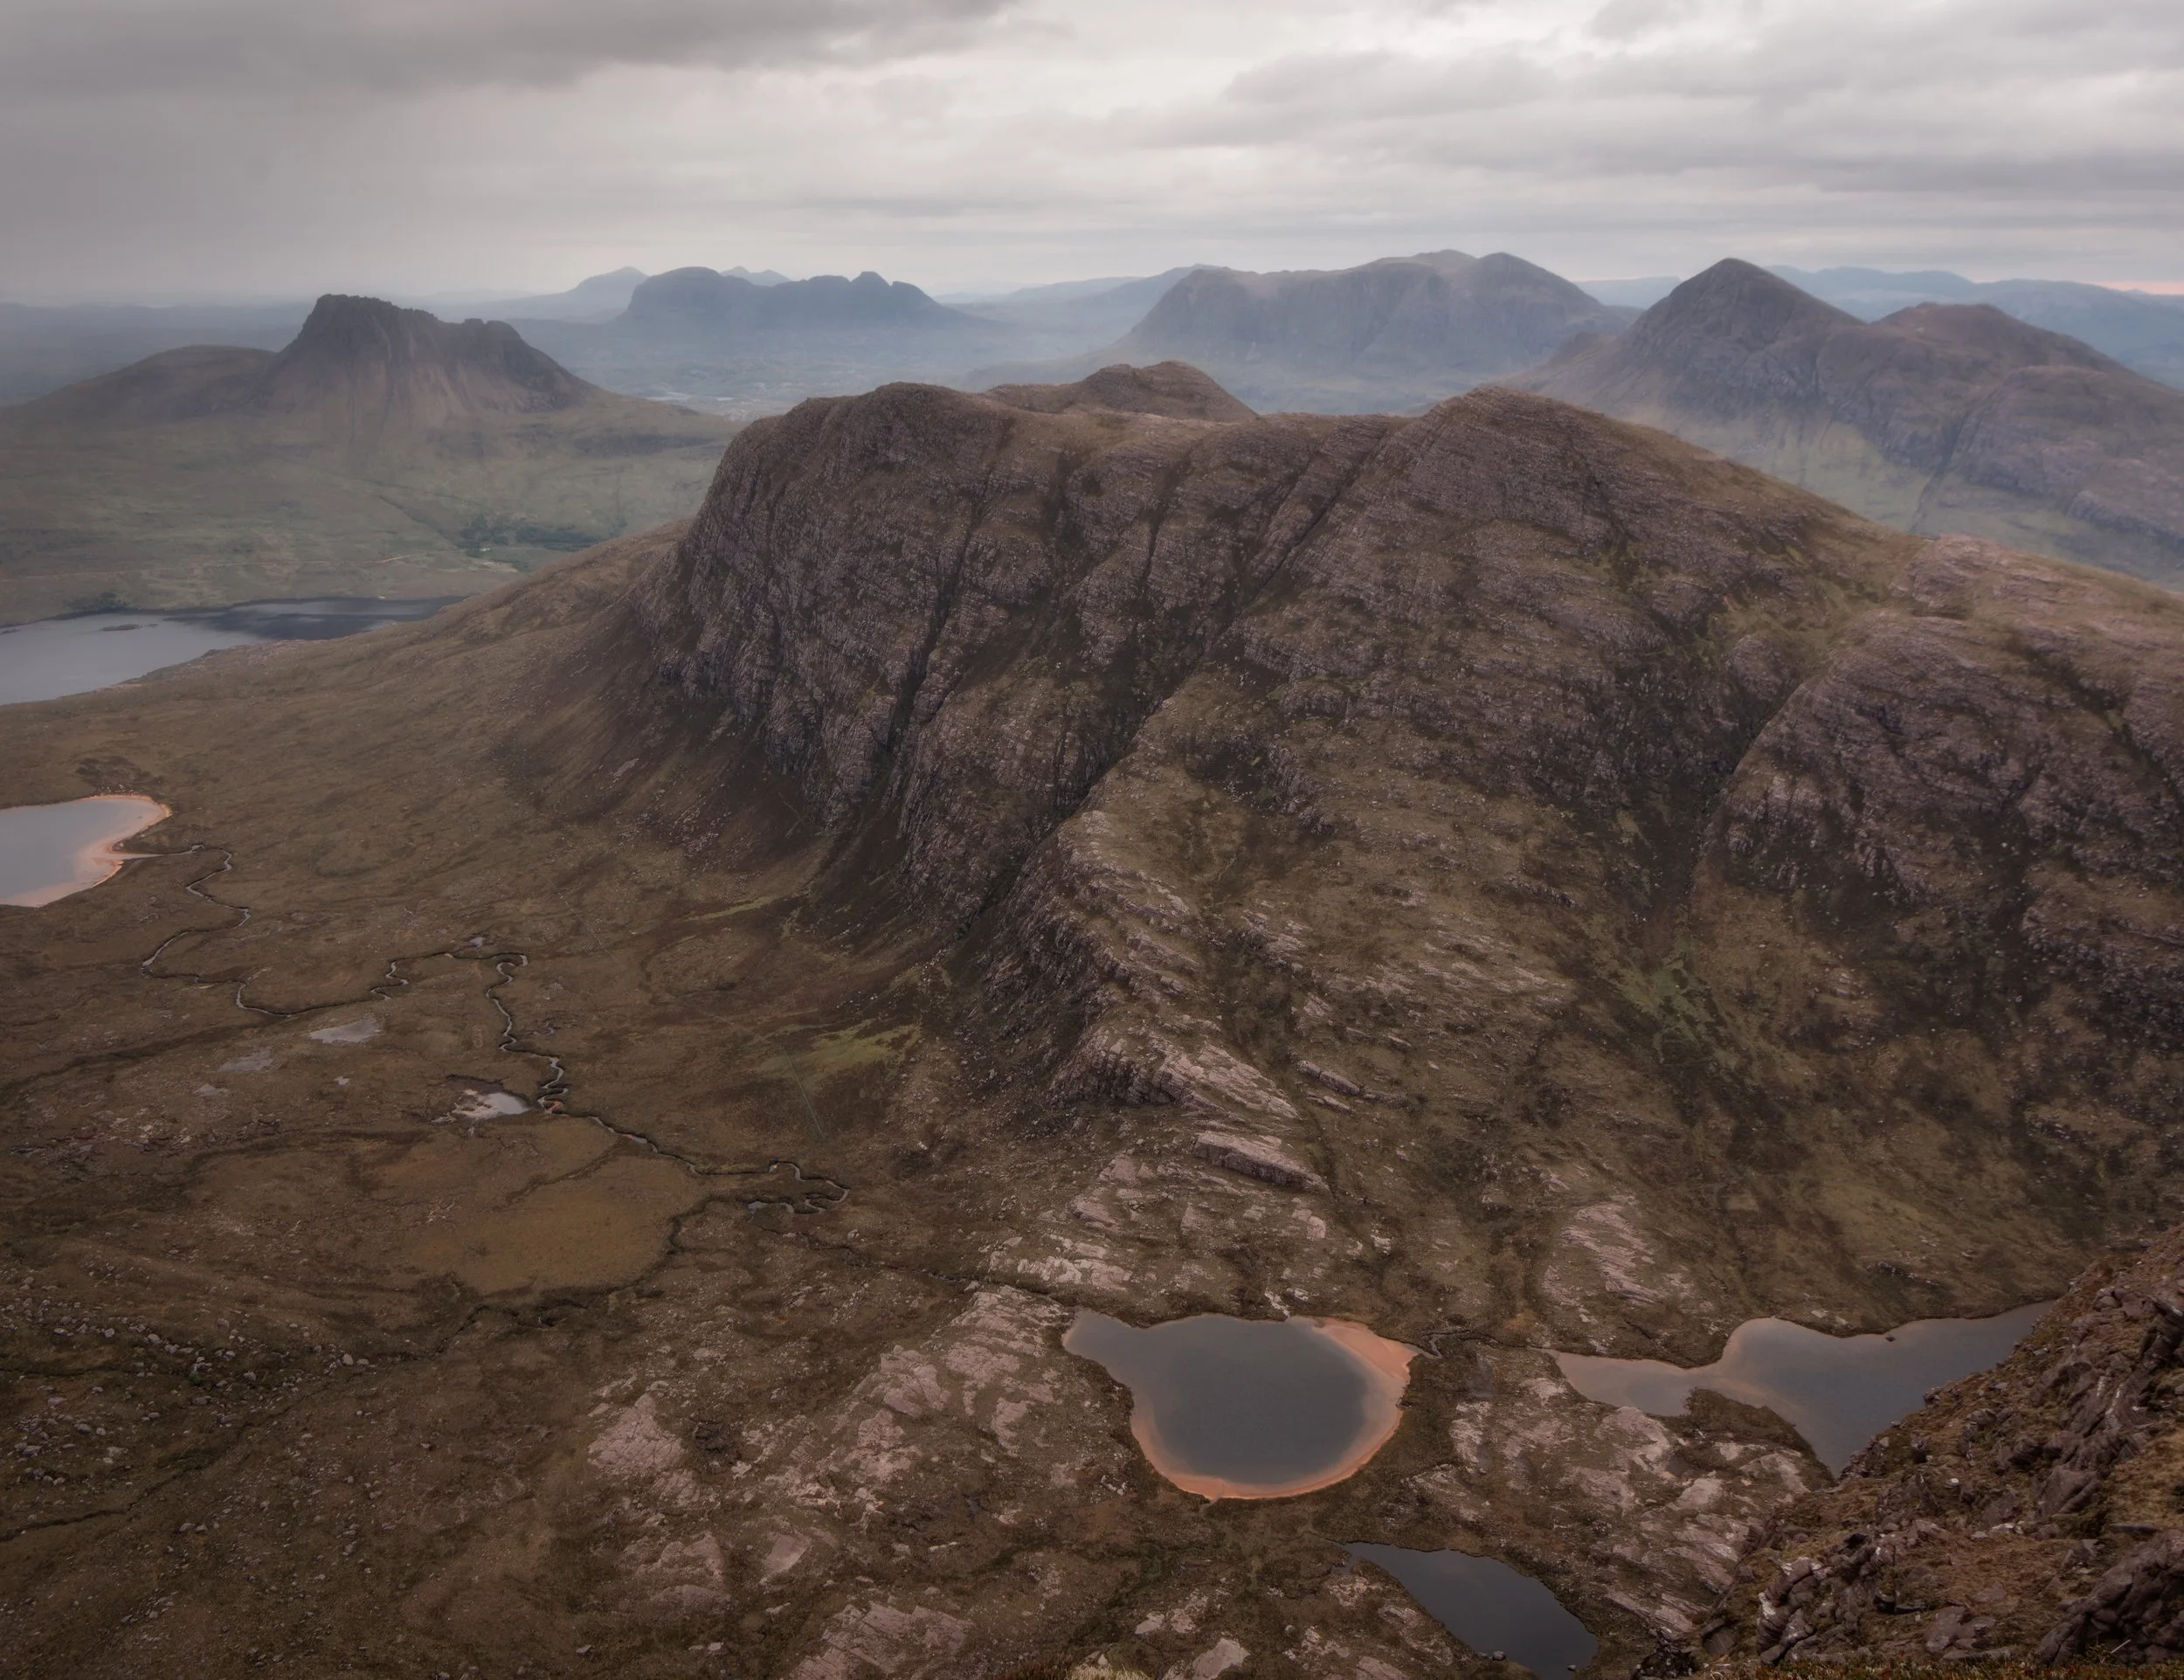
Capturing the beauty of the great outdoors in Scotland
The Frustrations of Hiking Photography

“Hiking photography should be easy, but it isn’t that simple"
Have you ever come back from an invigorating hike, eager to review your photos, only to be disheartened by the results?
It’s a common frustration for many photographers.
In this blog post, I'll share five essential tips to ensure your next outdoor photography session is a success.
Plus, there's a bonus tip at the end that might surprise (or annoy) you!
Tip #1: Focus on the Foreground

One of the first lessons I learned in landscape photography is the importance of the foreground. When you're out in the mountains, it's easy to get distracted by the amazing vistas.
However, the key to a compelling photograph often lies at your feet.
Using a wide-angle lens, I make it a point to include interesting elements in the foreground, such as rocks, plants, or water.
This technique adds depth and scale to the image, making the scene more visually appealing.
It draws the viewer's eye through the entire frame, creating a more engaging photo.
For instance, on this adventure, I focused on the beautiful heather, setting my aperture to f/16 to ensure everything from the foreground to the distant mountains was sharp.
This approach not only highlights the main subject but also provides context and a sense of place - the viewer should feel like they are standing in the very spot the photographer was when pressing the shutter button.
Foreground elements like flowers, rocks, or water bodies can significantly enhance the look of your landscape shots.
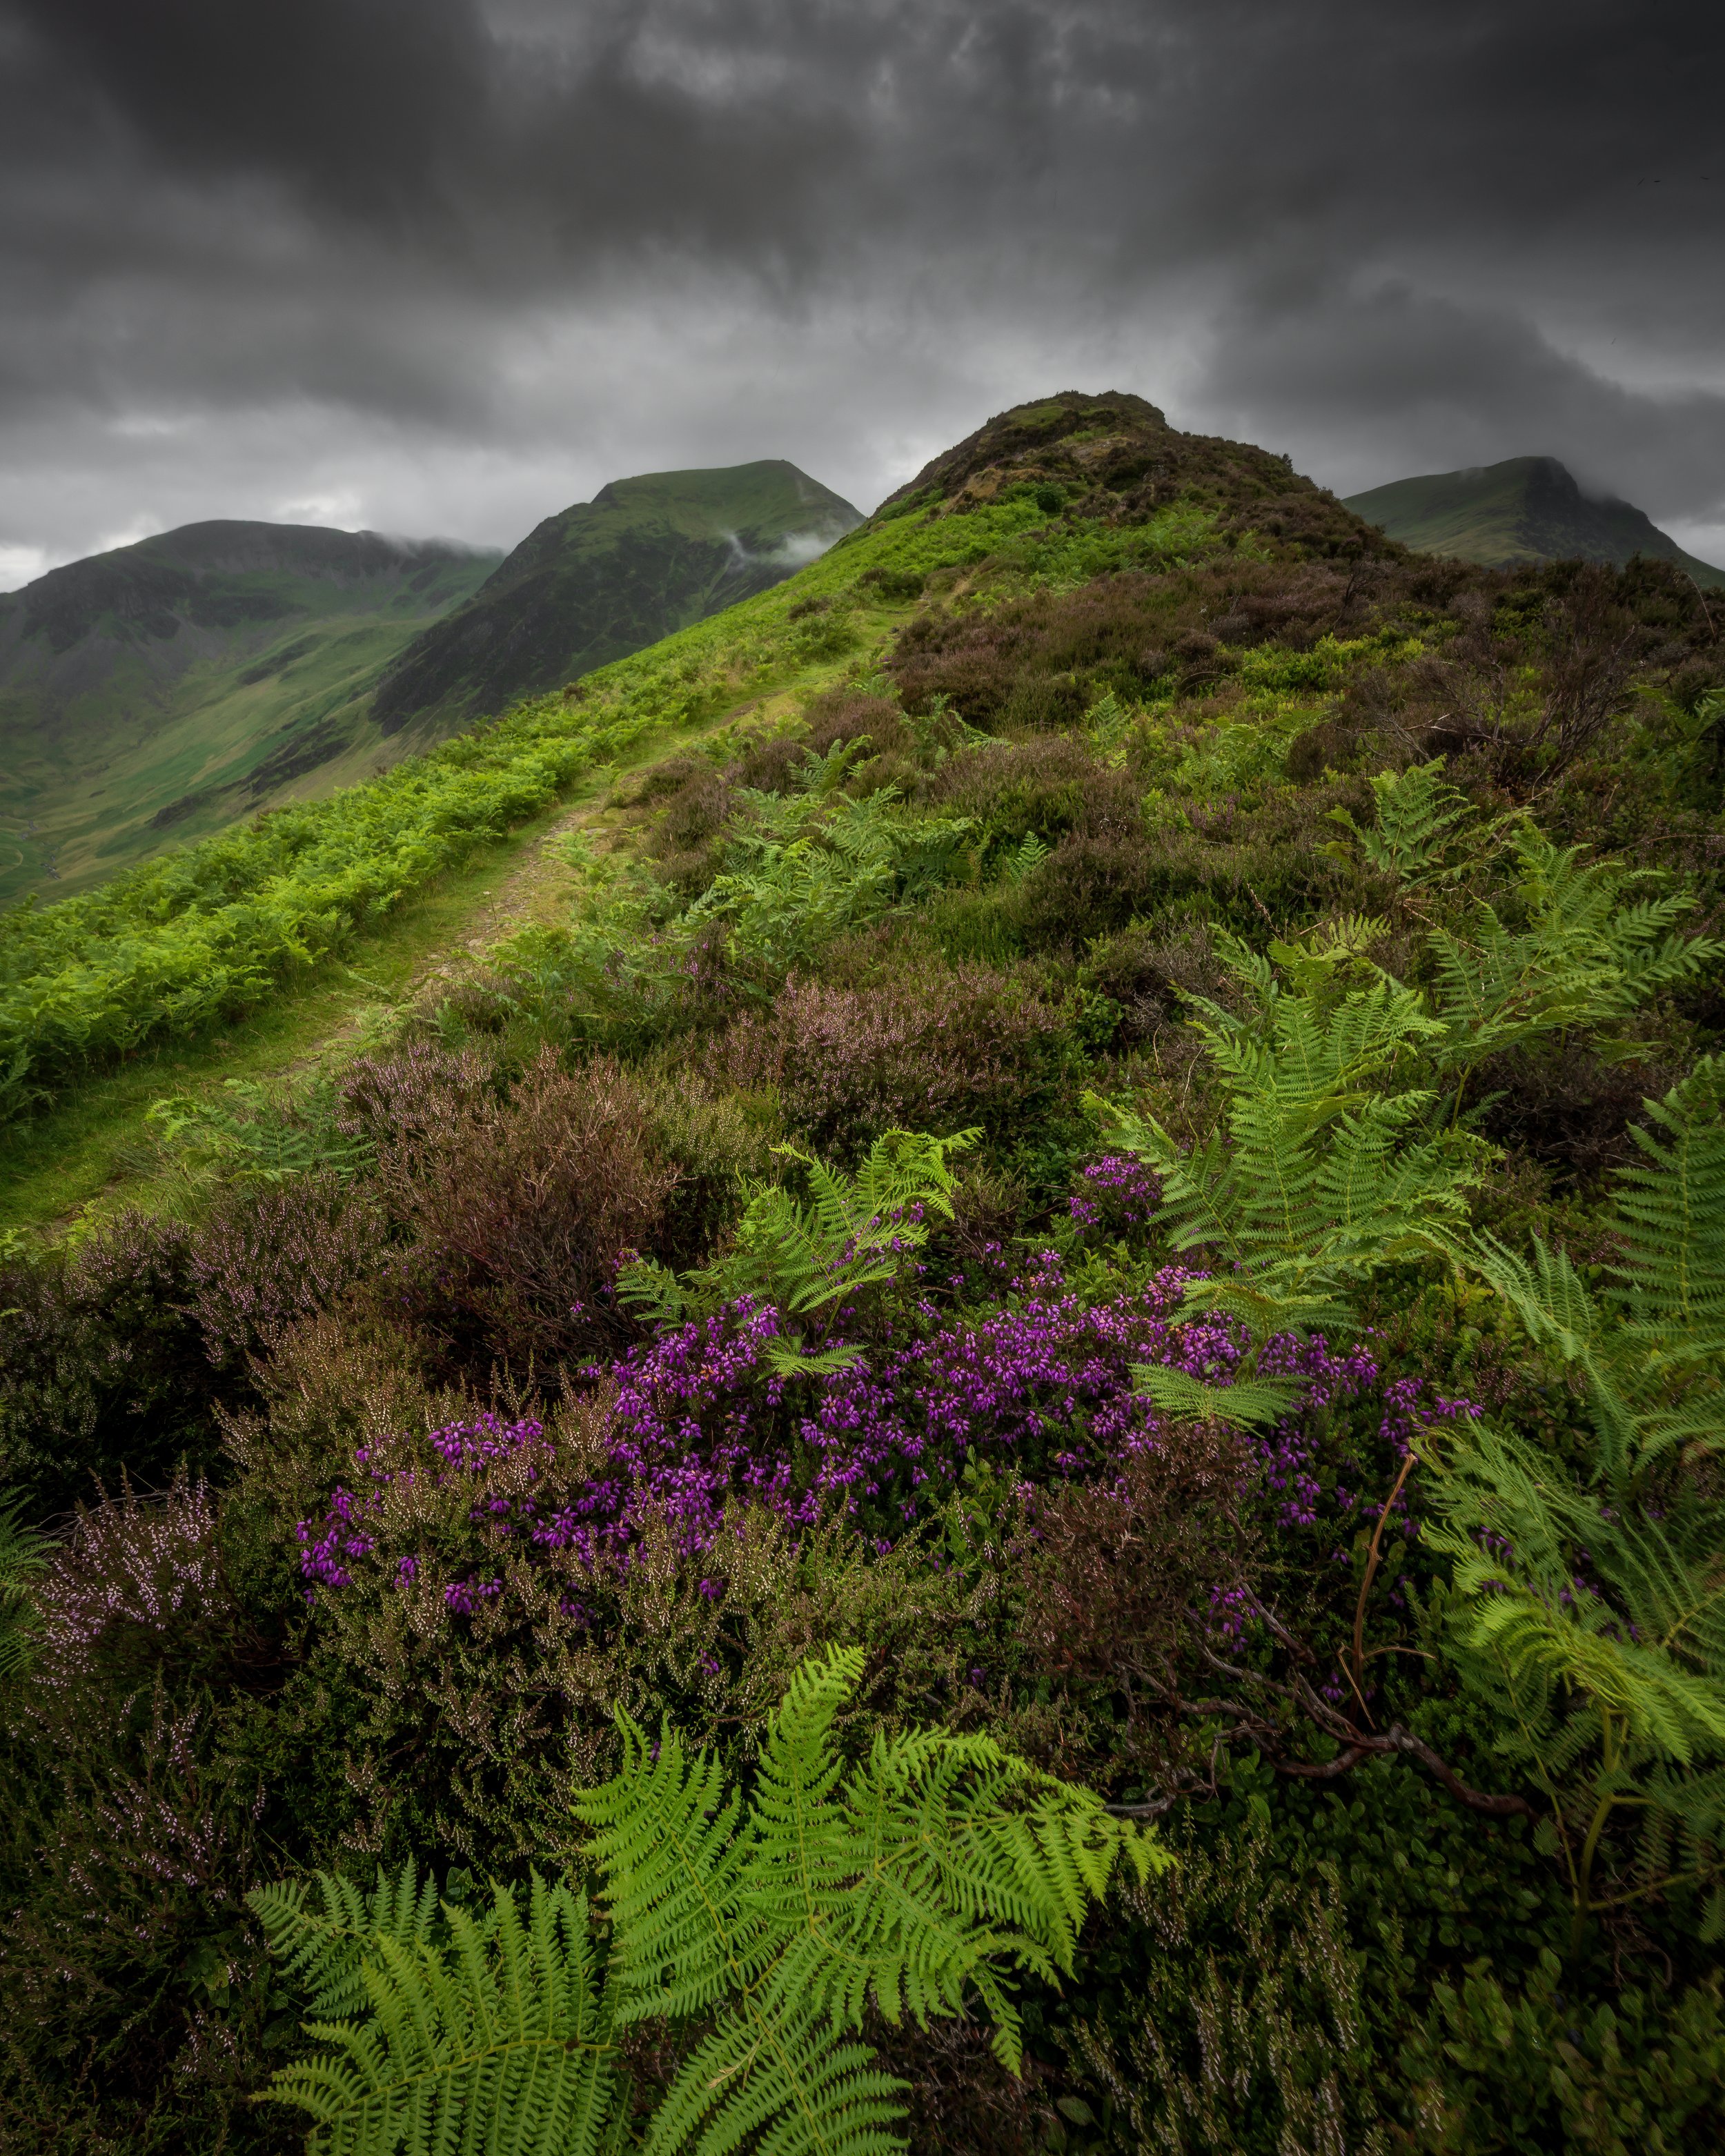
A classic ‘hiking photo’ of the Lake District. Note the heather and bracken adding texture and helping to ‘anchor’ the whole photograph
Tip #2: Equip Yourself Properly
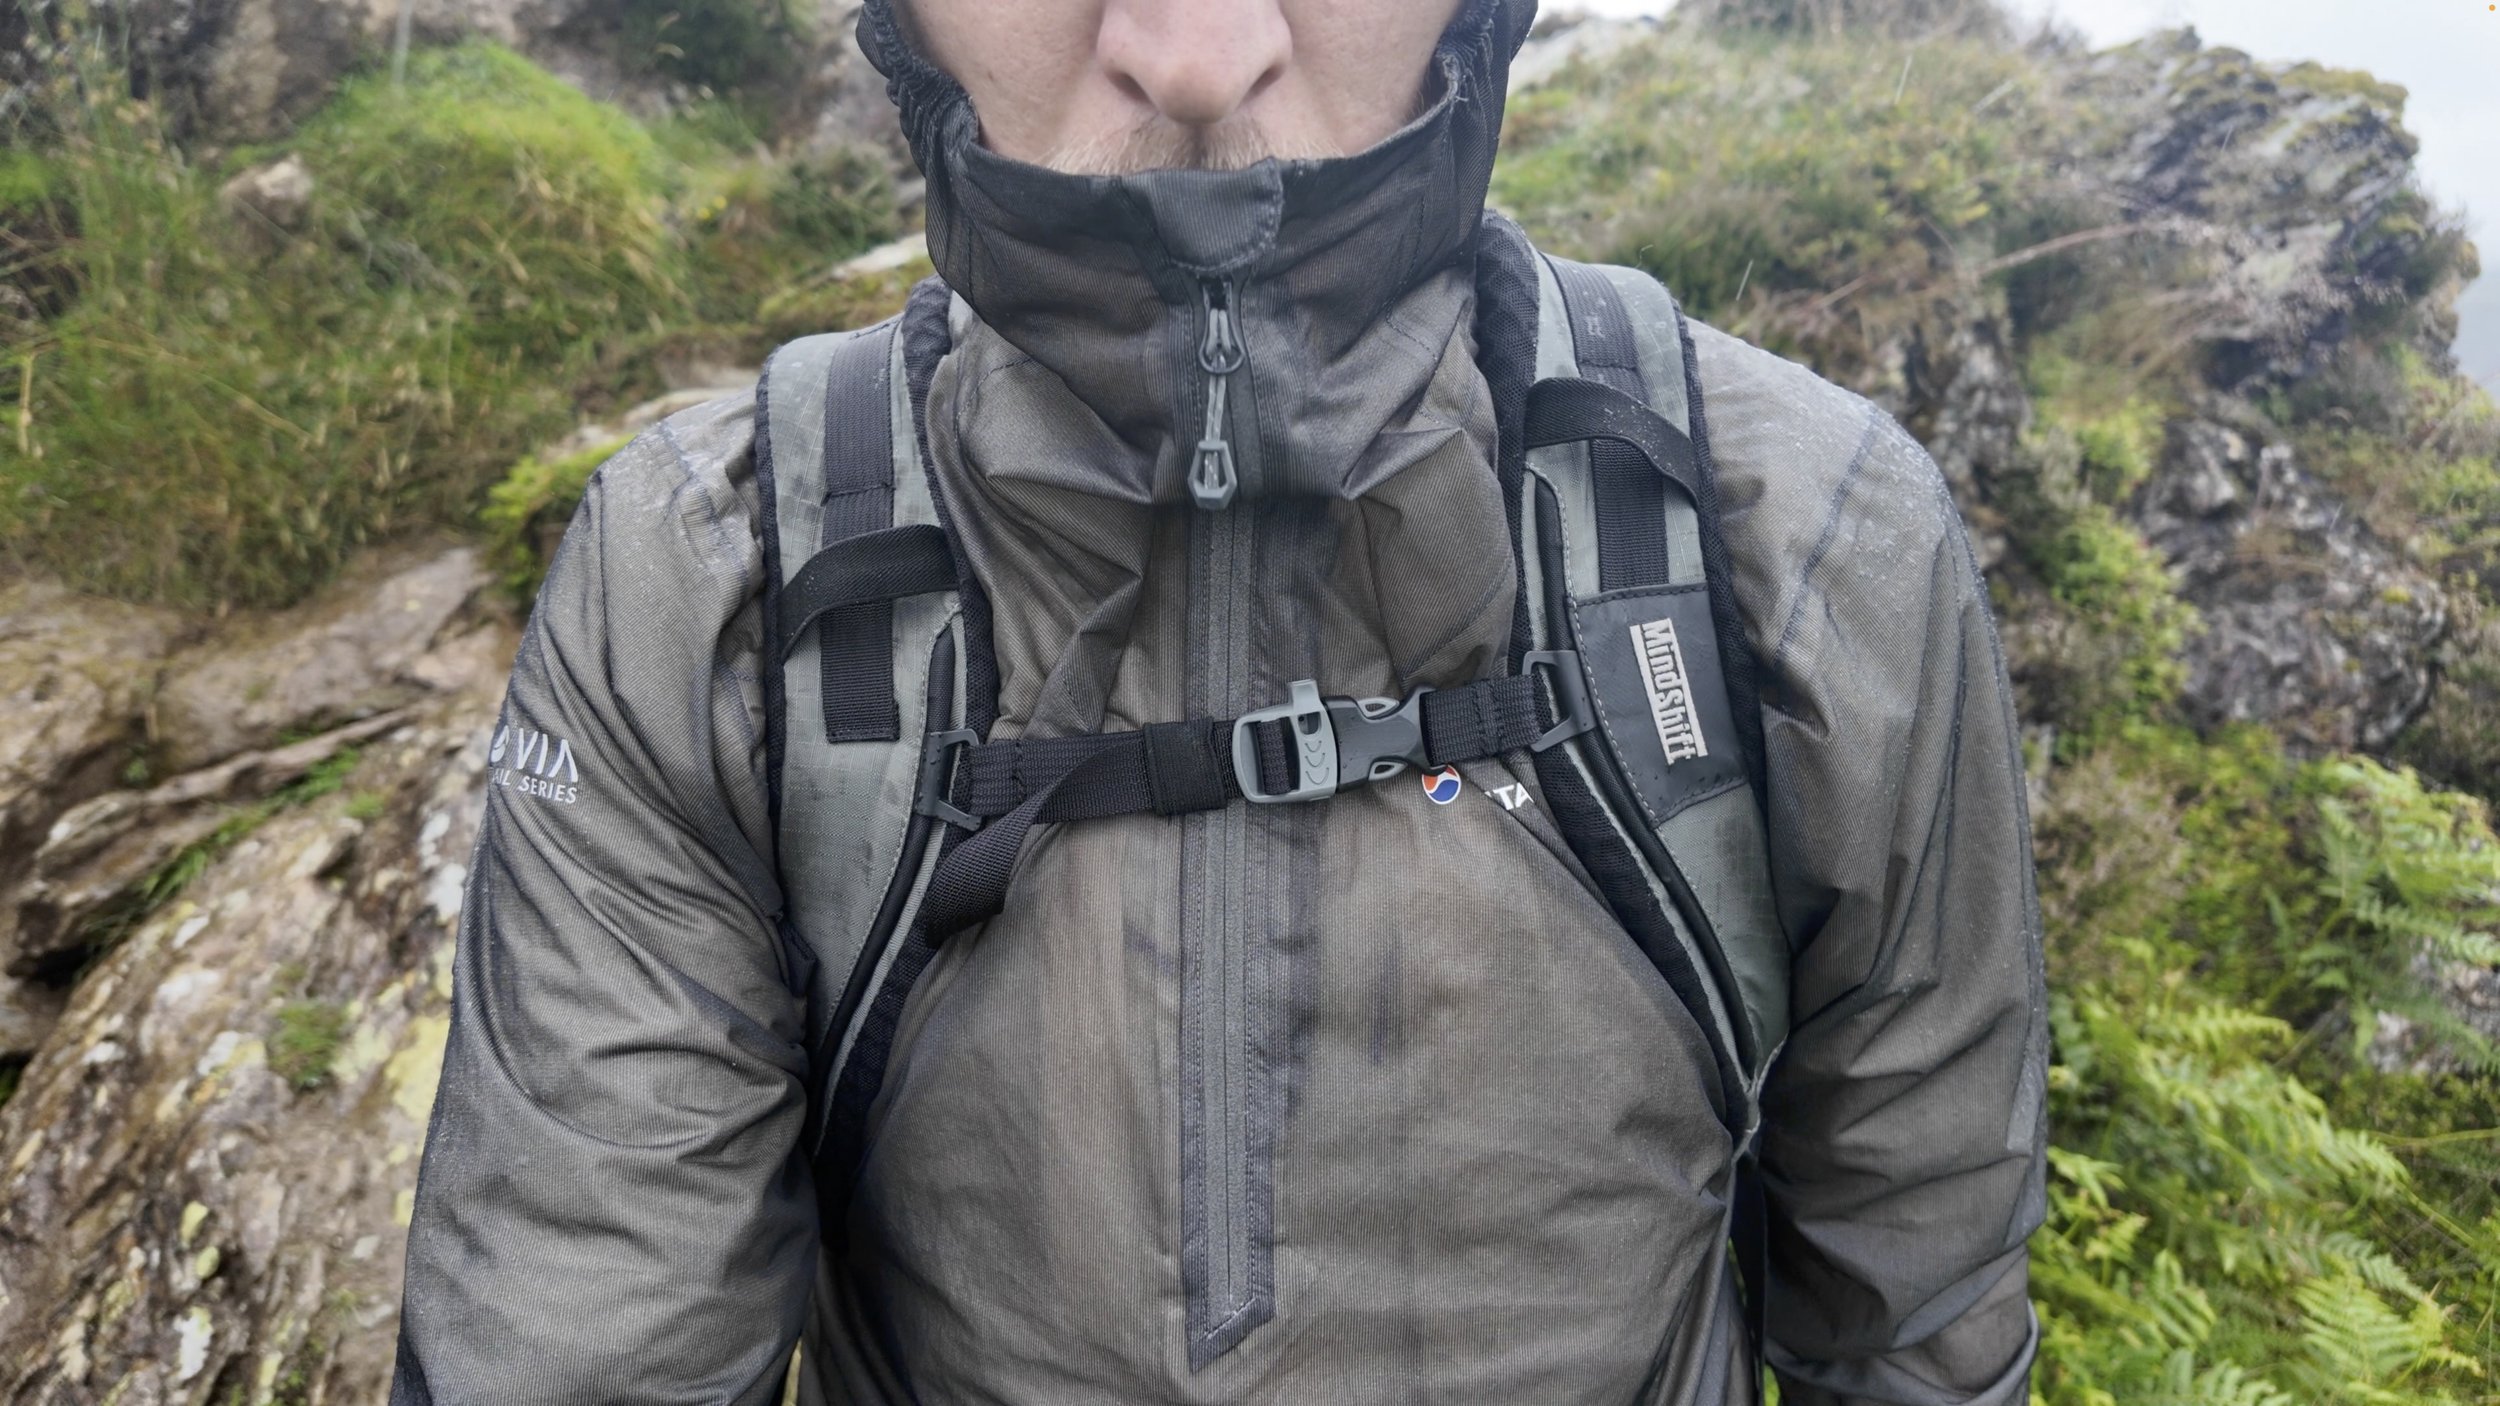
My Mindshift Backlight 26L Photography Bag and my Montane Trail Running Waterproof Jacket (Very Lightweight). Check out all my gear: HERE
Hiking photography demands more than just a good camera.
Having appropriate gear is crucial. Proper preparation can mean the difference between a successful shoot and a miserable experience.
I always carry weather-appropriate clothing and sturdy hiking boots.
Being uncomfortable or ill-prepared can ruin your motivation to take photos. Imagine hiking in flip-flops during a rainy day – not only is it unsafe, but you also won’t be in the mood for photography.
A good camera bag is equally important to protect your equipment from the elements.
Ensuring your gear is safe and easily accessible allows you to focus on capturing the perfect shot.
Remember, your comfort directly impacts the quality of your photos.
Stay prepared, and you'll enjoy the experience even more!
Additionally, packing essentials like water, snacks, and a map can make your adventure smoother and more enjoyable.
Weather conditions can change rapidly, so having layers and waterproof gear is always a smart choice.
Tip #3: Bring a Telephoto Lens

Using my beloved Nikon 24-200mm lens to take some artistic shots of Catbells’ summit. (See image below)
While wide-angle lenses are essential for hiking, a telephoto lens can be a game-changer.
It allows you to zoom in on distant details and create stunning compositions with a compressed perspective.
This versatility is invaluable in landscape photography.
On this adventure, I used my 24-200mm lens to capture some dramatic, close-up scenes of Catbells shrouded in mist.
This lens versatility enables me to adapt to changing conditions quickly, making those distant, views more accessible and ultimately, take better hiking photos.
A telephoto lens helps in isolating subjects and compressing the scene, which can add a dramatic effect to your photos.
It’s perfect for capturing distant peaks or interesting cloud formations.
Including both wide-angle and telephoto shots in your portfolio provides a more comprehensive view of the landscape (and hike).
Experimenting with different focal lengths can bring surprising and beautiful results.
Don’t be afraid to play around with your telephoto lens to capture unusual perspectives and details that might otherwise go unnoticed.

I grabbed a quick shot at 120mm whilst the mist came in to Catbells. Can you see the hikers?
Tip #4: Scout Your Locations

I love to use The Photographer’s Ephemeris to plan where the sun will rise or set for my hike.
Preparation is key to successful landscape photography.
Before heading out, I research my locations using topographic maps and apps like PhotoPills. These tools help me understand the terrain and plan my shots according to the sun's path.
By knowing what to expect, I can visualise potential compositions and make the most of my time in the field. Additionally, browsing Instagram or Google Images for snapshots of the area provides valuable insights without setting unrealistic expectations.
Researching the location beforehand can help you find unique perspectives and avoid common pitfalls. Apps like the Photographer's Ephemeris can show you how the light will interact with the landscape at different times of the day. This knowledge allows you to anticipate the best times and spots for shooting.
Moreover, scouting online can reveal hidden gems that aren't immediately obvious. Local photography forums and social media groups can be invaluable resources for discovering lesser-known but equally stunning locations.
Tip #5: Shoot During the Golden Hours
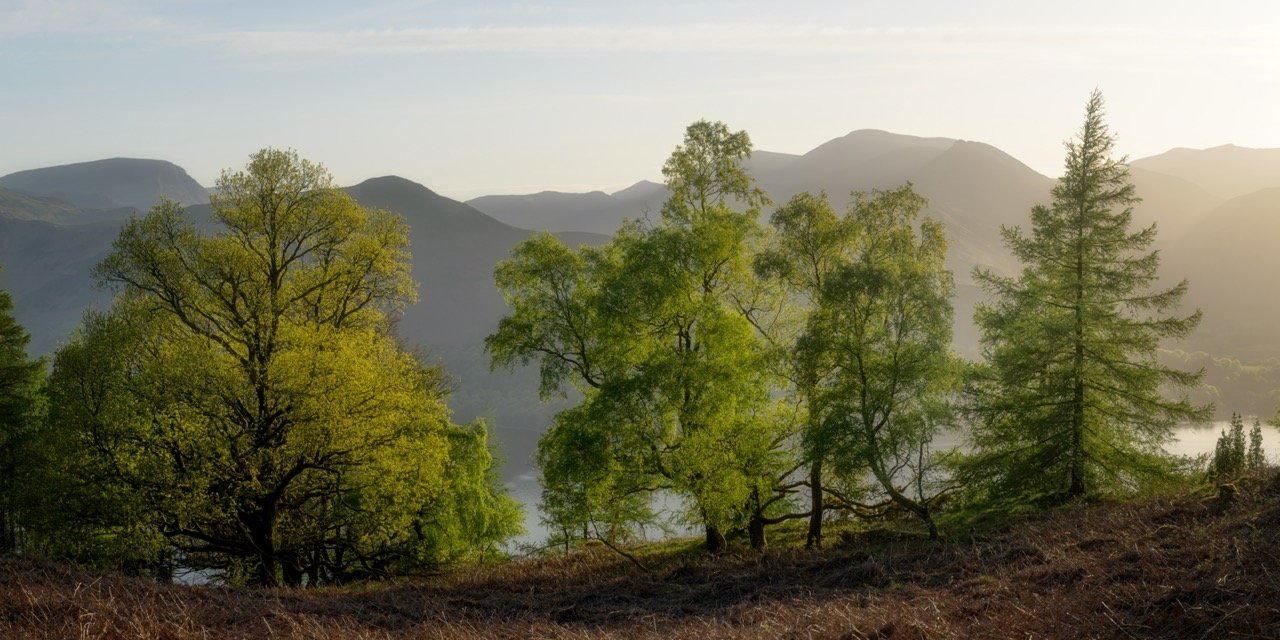
Golden hours provide the most magical lighting conditions. Taken with my Nikon Z7 and 24-200mm lens at 71mm.
Lighting can make or break a photograph. For the best results, aim to shoot during the golden hours – around sunrise and sunset. The light is softer and warmer, creating a magical atmosphere.
Although it requires more effort and planning, the results are worth it! The golden hours provide a unique quality of light that enhances colours and adds depth to your photos. This time of day can transform an ordinary scene into something extraordinary.
Be careful and use a head torch, I use this one: Olight Perun 2 Head Torch
However, don't completely disregard shooting during the day. Some of my most striking images were taken under dramatic weather conditions. Embracing varying light conditions can lead to unexpected and stunning results. Always be prepared and flexible with your schedule.
Capturing the changing light can add a dynamic element to your photos. Be ready to adjust your settings quickly to make the most of fleeting moments of beautiful light. The soft, warm tones of the golden hours can bring out the best in any landscape.
Bonus Tip: Consider Ditching the Tripod

I often now enjoy using my OM System OM-5 with no tripod to save weight on hikes.
Here's a bonus tip that might be a bit controversial: consider ditching the tripod, or at least think about bringing a lightweight travel version. Traditional heavy tripods can be cumbersome and tiring to carry, especially on long hikes.
Lighter gear means more mobility and less fatigue, allowing you to focus on finding the shot. In many situations, especially with modern image stabilisation, you can achieve great results without a tripod.
However, if you absolutely need one, opt for a small, portable tripod that won't weigh you down. This approach has transformed my hiking photography, making the experience more enjoyable and less physically demanding.
Ultimately, the choice is personal and depends on your style and preferences. Experiment with both methods to see what works best for you and your photography needs.
Conclusion

An image taken in one of my favourite locations in Scotland using my DJI Mavic 3 drone.
Each of these tips have been tried and tested on my adventures, and they've helped me capture some of my favourite images.
Thank you for joining me on this adventure and do checkout the YouTube video on this topic below!
If you enjoyed this post, you might also like…

Top 5 Lake District Photography Locations You Must Visit
What are the best Lake District photography locations? My blog shares a detailed guide to capturing the landscapes of the Lake District, including iconic spots like Buttermere and Tarn Hows. Each location is described with tips on the best times to shoot and recommended gear to bring. Perfect for photographers looking to explore and capture the beauty of the Lake District.
Jun 30th, 2024

Tips and Insights for Stunning Coastal Photography
Looking to improve your coastal photography? My latest blog shares tips and insights for capturing stunning coastal landscapes. Learn about the best times to shoot, essential gear, and techniques for composing seascapes. Whether you're aiming to capture the crashing waves or splendid sunsets, these tips will help your coastal photography skills and inspire your next seaside adventure.
Jun 26th, 2024

How to Find Photogenic Woodlands for Photography | Tips
Looking to find the best woodlands for photography? This blog offers a guide on how to discover photogenic forests. Learn how to identify prime woodland locations, the best times to visit, and compositional techniques for capturing the beauty of the woods. This guide is perfect for photographers seeking to explore and photograph woodland landscapes.
June 26th, 2024

About Me
I'm Henry Turner, a UK-based professional landscape photographer and YouTuber. I share my adventures through in-depth articles, location guides, and photography tips to help you capture stunning landscapes. My journeys span Scotland, The Lake District, Wales, and beyond. Every week, I post new blog content and YouTube videos.
Search the Blog
Featured Posts


My Gear Blog
